ND1 “Quick Tour”

Welcome to ND1. Please take a moment to familiarize yourself with the anatomy of ND1 or ND1 Classic:
Getting to know your new calculator.
Del/Undo
ND1
ND1 Classic
Stack and Graphics Display
Edit line
Enter
Del/Undo
“comma” key


2nd level

2nd level

Tap the Drop (⇓/DROP) key repeatedly, until nothing is displayed. (Or find the ⌧ (CLEAR) key and clear the stack in one go.)
Your display should look like this now:

Tap “2”, tap Enter, tap “2”, tap Enter.
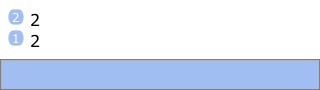
Tap “+”.

What you just did may surprise you. You first entered the numbers you wanted to add, and then added them.
This is what RPN is about.

RPN seems counterintuitive to everyone at first. After a few minutes, you’re going to like it. After a few days, you may not want it any other way. The two main advantages of RPN over the usual “algebraic” form of entry are: you save keystrokes, and you see intermediate results as you do calculations. This allows you to do mental sanity checks, as you go along.
Counting keystrokes, it appears we’re worse off so far as we needed 5 keystrokes versus 4 for the sequence you’d type with a “normal” calculator (“2”, “+”, “2”, “=”). It turns out, there’re various short-cuts and RPN will never require more keystrokes than algebraic entry. Try this:
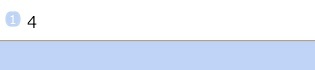
Tap “2”, tap Enter. Tap “2”. (No second Enter.)

Tap “+”.
You saved one keystroke by omitting the second Enter.
Tap Drop to clear the display. (Drop is an “operator” that takes one item from the stack and returns nothing.)
ND1 also supports an algebraic (ALG) mode. You switch to it by tapping rpn on the edit line. The edit line then turns green and shows alg. In this mode, you can tap “2” “+” “2” and you get an Equals (=) key. Use in this mode is straightforward, but see rpn vs. alg for usage notes.
In either mode, ND1 supports algebraic notation, and there’s a specific type for algebraic expressions:
Tap the Expression/Name key, followed by “2”, “+”, “2”

Tap Enter.
Now there’s an “expression” on the stack. In order to see what the numerical result of the expression is, you have to “evaluate” it. You do so with the Eval (eval, EVAL) key.
Tap Eval.
RPN and Evaluation are the two “alien” concepts introduced with RPN calculators.
(And from here on, there won’t be any more such surprises.)
Tap Drop to clear the display.
There’s another way to do this computation:
Tap the edit line. This brings up the normal iOS keyboard.
Tap “2”, “+”, “2”.

Tap Enter.
As you see, there’re two methods to enter text into the edit line:
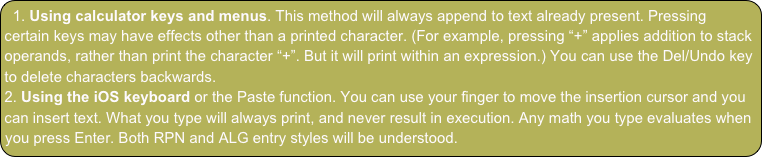
You’ve discovered four ways to compute “2+2” in ND1: using RPN, the “normal” way in ALG mode, using an expression, or tapping an algebraic using the iOS keyboard in RPN mode.
Task 1: “2+2”
Drop

Drop

Expression/Name key

Expression/Name key

Eval

Eval

Let’s solve this task with what we now know about RPN.
Tap Drop to clear the display.
Tap “5”, tap Enter.
Tap the 2nd level key and “3” (Classic: “.”). This yields π, which is the 2nd level function of the “three” key.
Tap Enter.
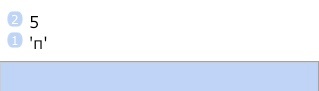
You notice that ‘π’ entered with quotes. This is to preserve pi in its symbolic form.
Tap “+”.
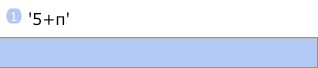
Rather than presenting you with a numerical result, ND1 will compute symbolically, if you’re dealing with expressions.
But, wait, we veered off course! We weren’t supposed to add. This is where undo comes to the rescue.
Tap the Del/Undo (⌫/↶) key.

We need the sine of pi. Where’s the sine key? With over five hundred functions, a key for each function is impossible. Hence, ND1 has “menus” and “soft-keys” which change their functions according to the current menu.
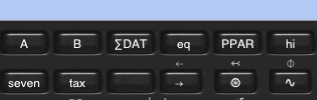
Tap the Menu key.
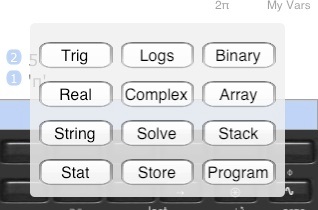
This pop-up allows you to select a menu. (In Classic mode you see less menus. The ones not displayed here, are available directly from Classic keys.)
Tap Trig.
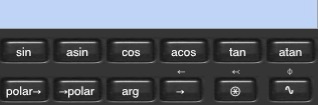
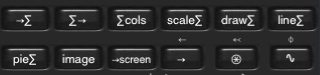
The previously “empty” (black) keys have assumed functions related to trigonometry now. In Modern mode you have 9 soft-keys, in Classic mode you have 6. You can step through “pages” of functions related to these menus with the → (NEXT) and ← (PREV) keys.
Tap sin (SIN).
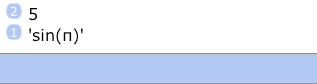
Again, because pi was in quotes we get a symbolic result. If we want to see numerical results, we need to evaluate. Let’s do that now.
Tap Eval.
ND1 correctly determines that the sine of pi is zero. (Many calculators tell you it’s something like -2.0676153e-13.)
Instead of finding sin (SIN) in a soft-menu, you could also have typed “sin” (or “SIN”) on the edit line, just like you typed other commands in the warm-up task. Sometimes it’s more convenient to use the menus. Other times, it’s more convenient to keep the current menu and quickly type out a function (whose name you must know).
Continuing on with our calculation, tap “2”, tap “+”.
Tap “*”.
Done. Notice that you typed no parentheses, although this calculation requires them. This savings came at the expense of you doing the calculation out of order, “from the inside out.”
This specific calculation would actually lean itself more toward having been entered as an expression and evaluated. Let’s try that, too.
Tap Drop to clear the display.
Tap the Expression/Name key, “5”, “*”, and for the opening parenthesis: 2nd level, “8” (Classic: “EEX”)

Tap sin (SIN). (That’s the sin (SIN) key, not the word typed out. You could do that too, but this would be more work.)

Notice how the function name is spelled out (with an opening parenthesis appended because “sin” is a function) rather than causing sine to be executed–because you’re in an expression.
Tap 2nd level, “3” (“.”) for pi.
Tap 2nd level, “9” to get the closing parenthesis in Modern mode, or tap into the edit line and get it from the iOS keyboard. (In Classic mode, you’d do Menu, String, NEXT and pick “)” from the respective soft-key, if you needed more than one closing parenthesis.)
Tap “+”, “2”. Stop here.

Tap Enter and notice how both closing parenthesis and quote are appended automatically. Closing off begun parentheses, brackets, quotes, program delimiters always works in this fashion. Exploit this, as it’s a major time-saver (esp. when it comes to complex numbers, vectors, and matrices, as you’ll see).
Tap Eval.

With the RPN method you didn’t have to hunt for parentheses and you saw the result of the sine evaluation. If, by accident, you would have been in Degrees instead of Radian angle mode, you’d probably spot it right away based on the intermediate result.
Both entry methods have their strengths.
Task 2: “5 * (sin(π)+2)”
Enough drudgery. Let’s do something fun.
Tap ∿ (PLOT; use 2nd level).
Tap draw (DRAW).
If you have Tips enabled (in the Settings app, under “ND1”) you’ll get a dialog that tells you what you can do while in graph view.
Dismiss this dialog for now.
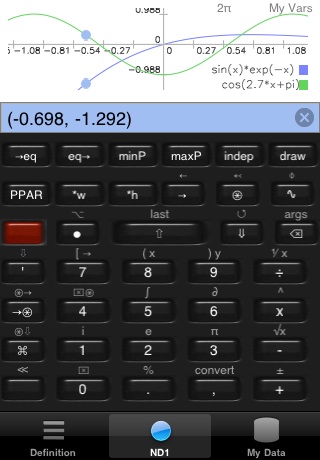
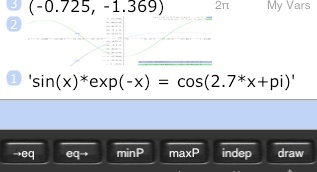
Drag a single finger over the view and notice what happens. The number pair in parentheses on the line edit are the current coordinates of the first graph.
Singe tap and see those numbers disappear. You just pushed them onto the stack.
Double-tap to go fullscreen.
One-finger-drag some more.
Two-finger-tap now. This takes a screenshot, and pushes it onto the stack.
Now drag with two fingers. This will move the graphs. Pinch, and this will zoom in and out.
Double-tap to come out of fullscreen view.
Tap the Space key (bottom left) to cancel graphic display and return to normal stack display.
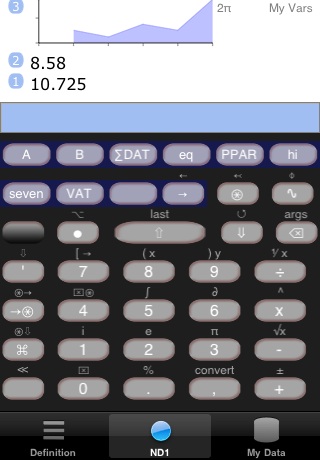
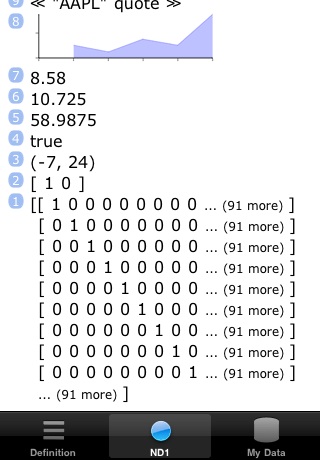
Double-tap the stack to see it fullscreen. Your stack should look something like this now:
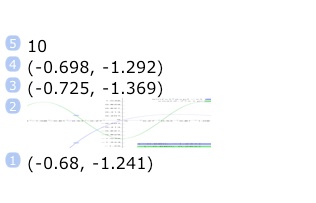
(You may see more or less digitized points (coordinate pairs), depending how often and when you single-tapped.)
Switch back out of fullscreen mode with a double-tap and tap Drop until the screenshot appears at stack position 1.
Now tap Eval OR tap → (NEXT), and →screen (→LCD).
You’ll see the same graph as before, except this time it’s not “live.” After all, this is just a screenshot (that is, the picture of a graph, not the graph itself).
Double-tap and tap ✔ to cancel graphics mode. (If you tap ✔↶ instead of ✔, you keep the screenshot on the stack.)
Task 3: Graph a function
Where did the graphs we just plotted come from?
Tap ∿ (PLOT) to see the first page of the Graph menu.
Tap eq→ (RCEQ).
This is the “current equation”, which was used for plotting. Two graphs appeared because it’s a proper equation (with a “=” between two expressions). If it were just one expression, only one graph would appear.
Alright, but where does this equation come from?
Switch over to the database by tapping My Data at the bottom.
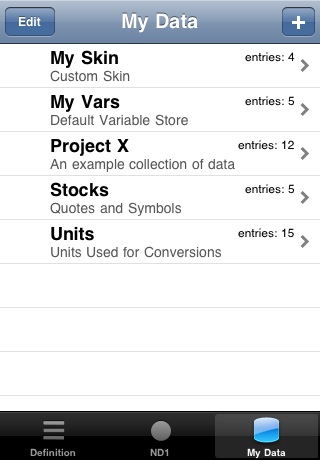
Data in ND1 is organized in folders.
You can create as many folders as you wish and give them any name. You may choose to organize your data by project, type of data, date range, etc.
ND1 comes preloaded with a couple of fixed folders (“My Vars” and “Units”) and the rest is example data that you may delete.
Shared folders are available in the Database under Downloadables, and can be downloaded with a single tap.
Tap My Vars.
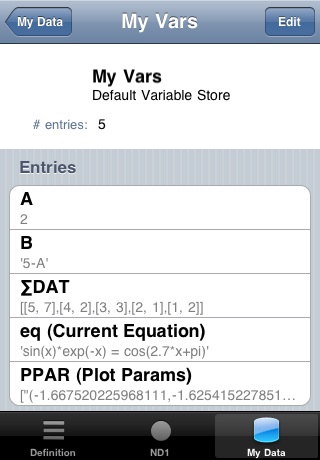
The entries in a folder each have a name and can have any of the various ND1 data types as their contents. There’s also a provision for a comment associated with the datum.
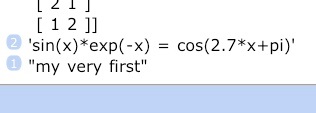
In this folder, there’s a variable named “eq” which contains an expression. It’s the one you graphed earlier, and then recalled.
eq is one of a handful of special names with a meaning to ND1. It is always the “current equation for graphing.” The comment on this variable, appearing in parentheses, says as much and exists to remind you of its special meaning.
You can add, edit, delete data in these folders, and the folders themselves, using standard iOS use practices. If you know how to use the Contacts app, you know how to work this database.
Let’s create one new variable: Tap Edit, tap Add Entry, give it a secret name and type “my very first” (*do* include the quotes!) in the Definition field. Leave the Comment field empty.
On the calculator side, one folder is the current, active folder. Let’s see how you access data and switch folders.
Tap ND1 or ND1 (Classic).
Notice that “My Vars”, the default current folder, has been displayed in the top right corner of ND1 all along.
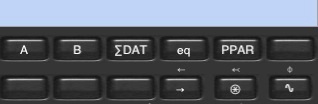
Now, tap the var (VAR) key. This is the “database access” key.
You’ll notice the same names that you saw in the database for the My Vars folder, incl. your very own secret name!
Tap A. Tap B. Tap ∑DAT. Tap eq.
As you see, this recalls the contents of these variables.
Tap your secret name. There it is!
If you are in a different function menu, you still have access to this data.
Tap ∿ (PLOT; use 2nd level).
Type A (just like this, w/o quotes) in the edit line.
Tap Enter.
As you see this recalls the contents of A in My Vars just fine. Tap Drop.
Tap the ⊛ (VAR) key to come back to the current database folder.
The connection to the database is two-way. If you wanted to change the contents of your secret variable you could switch over to the database and do it. But you can also do it in the calculator:
Tap 2nd level, tap ⇩(EDIT). (In Modern mode, the ⇩ is just below the 2nd level function; it’s not the Drop key.)

Position the insertion cursor with your finger right after the word “very” and delete the word using the iOS keyboard’s delete key.
Tap Enter to push the edited string.
To store, the calculator needs to have the contents of your datum in stack position 2, and the name in position 1.
Your secret name is right there on a key before you but if you press it you get the contents, not the name. What to do? (If you typed it on the edit line it would also just recall the contents. Just like A above did.)

Tap the Expression/Name key, tap your secret key. Tap Enter (or don’t; the next step will work either way).
Tap →var (STO).
Stack positions one and two disappear.
To verify the new contents of your secret variable, tap its key. Tap Drop.
Let’s store a new variable:
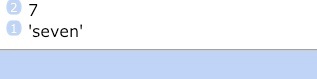
Tap 7. Tap Enter.
Type seven (just like this, w/o quotes).

Push Enter.

Tap →var (STO).
Note that seven now shows up as a key.
Switch over to the database and see the updated contents of your secret variable and seven appear in the database. Switch back to the calculator.
Now, let’s switch to a different folder.
Tap the var (VAR) key. Before, this brought you to My Vars, now it brings you one level up. The key is smart: if you press it while displaying a functional menu it brings you back to your database folder, but if you’re already displaying that folder, then it moves you to the top-level of the database.
On the top-level, you slip into a folder by tapping its name. Let’s slip into Stocks.
Tap Stocks.
Notice how the current database folder name, indicated in the top right, changed.
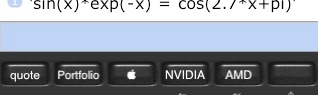
Let’s see how our favorite computer company is doing today on the stock market. Tap the Apple logo.

Your number will vary. Because, we didn’t recall a stored value. We executed a very small RPL program that called a JavaScript function that went out to Google Finance and obtained a real-time quote for Apple’s stock.
Task 4: Try the database
We skip explanations at the beginning and introduce concepts as we go along. Please do the tour sequentially and don’t skip tasks, or you might miss a concept.
Assuming you’re coming from the demo, please do the following now: tap ⊛var (Classic: VAR), tap My Vars
Make sure you have a blue Edit line. If it’s green, you’re in ALG mode. If so, tap alg to switch back to rpn mode.
(ALG mode is not covered here. Please see the notes under rpn vs. alg for usage info.)
Menu

Menu


Tap the Edit line, and use the iOS keyboard to type “scribble” (w/o quotes):

Now tap the Enter (⇧, ENTER) key.
You’ve just entered a command which makes your calculator rapidly draw randomly curved, “glowing” lines which fade into the background:

Tap the display (or tap Done) to dismiss the keyboard.
Double-tap the display to make it go fullscreen:


You’re looking at something that’s exceptional for a “calculator”, yet quite easily accomplished in ND1.
ND1 was created to be a modern day update of high-end HP RPN calculators, to which it remains very compatible.
It builds on the “true and tried” HP calculator model–and operates basically identically–while adding deep new features.
As far as we know, ND1 is the world’s first commercial JavaScript-programmable calculator. What you’re looking at is the result of running a small (~30 lines of code) JavaScript program. Programs thousands of lines long can be run.
ND1 has sharing features that enable developers to create new features and capabilities, and share them with users. Some are already available for download.
Two-finger-tap the screen once. This will take a screenshot.
Double-tap again, to go back to normal display.
Now tap the ✔ key at the bottom-left, to end graphics mode.
Supposing you two-finger-tapped to take a screenshot, your screen should now look something like this

(If you two-finger-tapped more than once, you’ll see more screenshots.)
The screenshot was “pushed” onto the stack.

Let’s push a number onto the stack:
Type “56”

and tap Enter

Commands (which we will also call “functions” or “operators”) operate on the bottom entry (or entries, if they take more than one input) of the stack and replace their inputs with their outputs (=results). The “scribble” command above took no inputs and produced no output. Most mathematical functions, however, do.
Let’s try a mathematical function that does something with our number and returns a result.
Type “divs”

Tap Enter
The command “divs” computes the divisors of a given number. Since there can be more than one result, the overall result is returned as a list (or “vector”, “array”) of numbers, in our case the numbers 1, 2, 4, 7, 8, 14, 28, and 56.
Besides numbers and vectors, ND1 supports a variety of data types, including “exotic” ones, like screenshot.
Just like there are commands that work with numbers, there are those that operate on vectors. Or screenshots.
Oftentimes, the same command can operate on varying data types, with sometimes quite different effects.
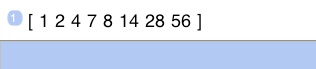
Let’s do the “divs” command again and see what it does to a vector. Instead of typing in “divs”, you can obtain the last command performed by tapping the 2nd level key, followed by the Enter key (Classic: the “7” key). Do this now.
It should yield

Tap Enter
Run on a vector, “divs” computes the divisors for each “element” in the vector (in our case, each previous divisor). So, you’re ending up with result vectors inside a vector. (This is also called a “multi-dimensional array” and one of ND1’s specialities is that it can deal with them, hold any kind of type, and that there’s no limit to the dimensionality.)
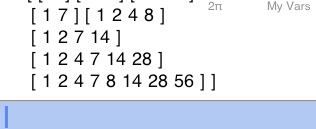
To see the obscured part of the result, flick through the stack with your finger. (And note that once you start to drag, you can use the full height of your device to “pull” the stack. You can drag right over the ND1 keys.)
Or, double-tap the display to go fullscreen.
Speaking of keys: you can hide the tabs to get larger keys and a bigger display.

The wealth of data types, and functions that can operate on those types, is what makes this calculator, and similar ones, “high-end.”
You’ll find that ND1 supports an unsurpassed array of data types. It also has a unique ability for developers to create new types. The amount of built-in functions is high, but the best hardware calculators from other brands support many that ND1 doesn’t support. (The HP-50g has code libraries with thousands of programs, for example.)
It is for this reason, that ND1 also supports programmability in RPL (the main HP calculator programming language). This enables it to tap into classic code libraries.
RPL and JavaScript can be used interchangeably, and the aspiration for ND1 is to offer an amazing platform for calculator programming.
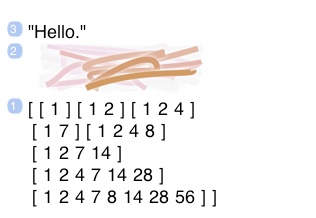
To close our warming-up session, try one really useful command. (Just after double-tapping the screen again to return to normal display.)
Type “email”:

This brings up the standard iOS email screen, with your stack as email body.
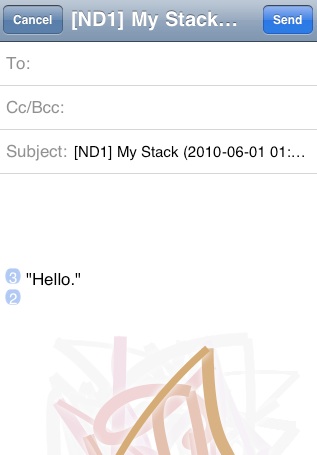
Your stack may show a log of your calculations, graphs of functions you plotted, intermediate results of lengthly calculations, results you want to keep, etc.
So, it comes handy being able to email it.
Note that your screenshot displays full-size now. You can take screenshots of anything shown in graphics mode. You can email yourself full-screen graphs (we’re coming to graphing in a moment) and print them from your computer.
Also note that you can edit this email. You can place the cursor between stack lines and annotate them, for example.
Tap Cancel now, or go ahead and Send this first stack email to yourself.
Great. You learned how to use the standard keyboard to type and issue commands. You learned some stack basics, how to toggle display modes, take screenshots, end graphics mode, hide/unhide the tabs, and email your stack.
Now, let’s backtrack and see how to do what calculators are really meant to do: calculate.
(If you’re familiar with HP calculators, you may skip the following tasks 1 and 2, but please read the green boxes.)
Task 0: Warming up
tabs


If you want to see just how small that RPL program is, tap the Expression/Name key, tap the logo again, tap 2nd level, tap var→ (RCL).
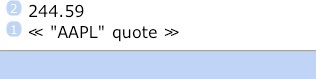
We just recalled the contents of a datum named “”, which happens to be an RPL (“Reverse Polish Lisp”) program. (An RPL program is bracketed by ≪ ≫.)
All this specific program does, is pushing a string, “APPL”, and quote on the stack. Latter happens to be a JavaScript program defined in the current folder. It, too, is a pretty small program. (And, incidentally, one that no other calculator known to us could run.)
You can do that manually, too: Type in any stock ticker symbol as a string (start it with a double-quote), and tap quote to get its real-time quote. Try it: type “INTC (no need for a closing double-quote), Enter, tap quote.
Here’s another example of something that is possible with user programming:
Switch the current database folder back to My Vars: tap var (VAR), tap My Vars
Switch to the graphing menu: ∿ (PLOT; use 2nd level)
Tap → (NEXT) until you see the line∑ soft-key.
Tap line∑.
Now, this does a line plot of example statistical data, from the variable ∑DAT, in My Vars.
It, too, is a smallish JavaScript program. One that could have been written by a user.
Two-finger tap to take a screenshot, tap Space to exit graphics display.


Support for JavaScript in a calculator has a huge potential. A modern, very powerful language, there’s a million things you can do with JavaScript and math. ND1 exposes a rich API and provides access to any JavaScript framework a programmer may want to use. Accessing the data in ND1 is trivial, and shown in the previous example.
RPL is HP’s invention and has been around for a long time. There’re thousands of programs. ND1 fully implements the RPL language as found in the HP 50g but does not support all commands and does not (yet) support interactive commands. Non-interactive programs (such as pure math programs) will run and you can bring them into ND1 from your computer, as discussed in the Data Sharing tutorial.
RPL is very easy to learn, as it can be as simple as a sequence of RPN steps that you perform on your calculator already.
To make the point, here’s you writing your first RPL program, without actually “writing” anything:
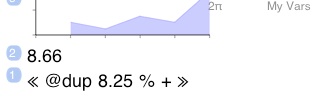
Subtask: write a program in RPL that adds California sales tax (8.25%) to a given amount
Time limit: you got 30 seconds, no more
Ready. Set. Go!
Tap 8. Tap Enter.
Tap Menu. Tap Program.
Tap ● rec
Tap Enter
Type 8.25
Tap Enter
Tap % (use 2nd level key or long-press “.” (Classic: 2))
Tap “+”
Tap ■ stop
Done.
Did you make it?
Cool!
Now, let’s see if it works.
Store under the name tax like so: type tax, tap →var (STO)
Display My Vars contents: tap var (VAR)
(In Classic mode, tap NEXT to advance to the next page to see the tax key.)
Now, enter a number (with or without Enter) and press tax.
Does the resulting number look like 8.25% tax have been added? Good.
See the tutorials for much more information about programming. ND1 was built to be great for programming.
Task 5: Have fun programming
ND1 is configurable.
You can rearrange and redefine every key, every menu. In fact, you can pull the entire user interface apart and build it up from scratch. You can inject JavaScript code at start-up and make it *be* something entirely different than a calculator.
Good thing, then, that there’s a Restore button.
(You can skip the remainder of this task if you’re not interested in changing ND1 keys, or come back to it later.)
Tap “Definition”.
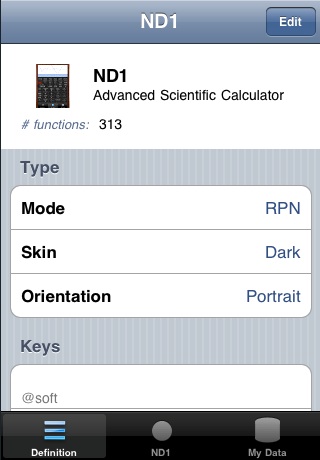
The Definition section of ND1 contains the definitions of all keys and all menus. You can change them to your heart’s delight and the UI for that is, once again, exactly the same that you’re used to from standard iOS apps.
If you add or remove keys, you’ll change the layout of the calculator. Be mindful of the effects this might have.
The Type section has two fixed items, Mode and Orientation, which can (currently) not be edited.
Under Skin you can select a new look for your keys. Our screenshots show the Dark look, for example, unlike the Default look yours has right now, which happens to be Light. (You can change your default in the Settings app.)
(Dark may look the most attractive, but Light is probably overall best to use because the keys are a little larger and easier to hit correctly.)
You can also specify your very own button look.
Here we go:
Tap Edit. Tap Skin.
Select Custom.
Go back and tap Done. (The two steps are optional. You can stay in edit mode, if you like.)
Go back to the calculator: tap ND1.
Now, this looks horrible, you say? Well, yes, you’re looking at ND1 naked. Where are your button bitmaps?
Haven’t got any right now?
Luckily, there’s a bunch on our server.
Tap My Data. Back out of My Vars, if you should be in there.
Tap My Skin.
Scroll to the bottom, tap Sharing.
Tap Download Assets. Watch the network indicator spin and disappear.
Tap ND1.
That’s better.
If you replace our links to images with links to yours, you’ll be picking up your own button images (PNGs with alpha transparency, please), and you’ll have a uniquely customized ND1.
(You may want to switch your skin to Light or Dark now. Unless you like this one better.)
Now, let’s change a key. Putting a new function on an existing key is very simple.
Tap Definition.
Tap Edit.
Let’s say that you figured that the square root isn’t really as important as sales tax to you. So find the “-, √x” key (sixth from the bottom of the keys section), and edit this
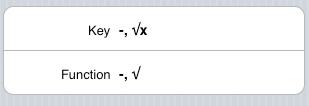
into this

Tap Save. Tap Done.
Tap ND1.
Try out your new key: enter a number, use 2nd level and tax.
To undo your change:
Tap Definition.
Scroll all the way to the bottom.
Tap Restore. Tap Restore Calculator.
Switch to the calculator and confirm it’s back to what it was before.
Task 6: Change some keys
To finish our tour, here’re some vaguely impressive things that you can do with ND1:
Make sure you’re still in My Vars. (If not, tap var (VAR). Tap it another time, if you’re in some other folder, to go up, and select My Vars.)
Tap eq
Tap ∂ (d/dx)
Assuming you have a working Internet connection, after a few seconds you will see this:
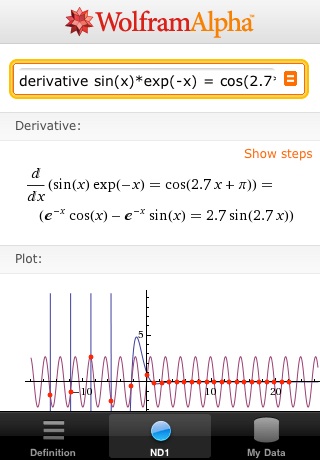
ND1 doesn’t (yet) have a CAS, and makes no attempt to integrate, differentiate, or do other functions of higher math. Instead, for a select few functions, it calls through to WolframAlpha™ for you, and displays the appropriate iOS-formatted webpage.
You can easily extend the existing support for other functions. (Or employ altogether different web services, for that matter.)
Double-tap and you’re back in the calculator.
ND1 does have full featured support for complex numbers and does do a lot of linear algebra.
Try this:
Switch to Project X: tap var (VAR), tap Project X.
Tap anExpr:

Tap Eval.

(We don’t know of another calculator that will give you this (correct) answer.)
You can pretty much do anything with complex numbers.
To type one in, use parentheses. For example to specify 3+4i: enter “(3,4” (w/o quotes) to arrive at

(the closing parenthesis was added for you, as usual)
There’s a Complex menu only for complex numbers, but other functions are aware of complex numbers, too. All basic operators and trigonometric and logarithmic functions work as expected.
For example, tap Enter to double the last stack entry

and tap * to arrive at

Some keys are very overloaded in the sense that they execute altogether different functions depending on the type of objects they’re invoked on. The “+” really has 14 different functions, where real and complex number addition are just two. (And, yes, you can mix the two types.) But we’re counting “+” only as one in our 500-functions count.
Let’s take a quick look at vectors and matrices:
Tap rotMat2D, tap varVec, tap θ
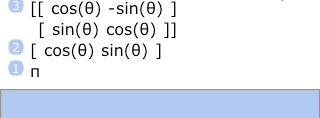
Notice there’s a variable, θ, in both our matrix and vector, and the value of this variable is a symbolic value, π.
Tap Drop to remove π from the stack. (We just wanted to inspect θ.)
Tap *. This now performs a matrix-vector multiplication and shows the evaluated (and precise) result.
You can similarly (with reversed arguments) use divide to solve a system of equations. (See the tutorial for that.)
Finally, another thing you’re unlikely to be able to do with another calculator:
Type and enter 100.
Tap Menu, tap Array.
Tap → (NEXT).
Tap identity (IDN).
Double-tap the stack.
You should see something like this:
The matrix is a 100x100 matrix, with ten thousand elements.
Being too large too display, you get an abbreviated representation.
Type and enter: RANM
(This classic command randomizes the matrix to values between -9 and 9. You can also type “randomize” instead to get values between 0 and 1.)
Now tap 2nd level, ⅟x.
This does a full matrix inversion.
A hardware calculator will fail because of the memory consumption for this and, if it could do the calculation, would take a long time for it. (Scaling the time from a smaller matrix that works on a HP-48+, it would be ~10 minutes. A popular iOS-based emulator also cannot cope with the size and its speed for a 20x20 matrix indicates a speed 1/8th of ND1.)
To finish, let’s package up, quite literally:
Double-tap to get back to normal-sized stack display. (Btw, you did notice that you can scroll through the stack with a flick of your finger, right?)
Tap Drop to get rid of that big matrix.
Tap Menu. Tap Stack. In Classic mode only: Tap → (NEXT)
Tap depth (DEPTH)
Tap →array (→LIST)
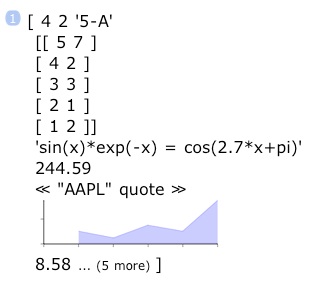
If you look at the stack now in fullscreen mode, you’ll see that the entire stack contents have been packed into one vector, containing quite different types of objects as elements (even one screenshot!).
Now let’s save this as a variable named “stack”:
Enter the name ‘stack’ (w/ or w/o quotes).
Tap →var (STO).
With the only remaining element taken off, the stack is empty now.
(These exact steps are on the pop-up menu’s ↓stack button. Use that in the future to save your stack.)
Last, let’s email this to yourself:
Tap My Data. Go into My Vars. Make sure stack is in there.
Tap Sharing, tap Email. Fill in your details and tap Send.
On your computer, you will see the entire contents of the My Vars folder in JSON format. (Make sure to open the text file as UTF-8.) The screenshot is a data URL that you can paste into Safari or Firefox to see it as image.
It’s far easier to just email the stack to yourself, as you did in the beginning. But it’s through data sharing that you can get access to the actual data. You can change the data and reimport it into ND1, as described in Data Sharing.
Task 7: Do something impressive
Thank you for doing this tour. And: congratulations! You got the most important ND1 concepts under your belt now!
There’re more things that would have been worth showing here (such as the extensive unit conversion system), but this is where the tutorials come in.
Please: do Just a Few More Things whenever you’re ready to absorb more. It’s much shorter than this tour was, and tells you about a few more essential things (like the swap key).
There’s more documentation on this website that you may want to peruse.
You’re encouraged to download Shared Folders and check them out. You’ll find more information about them in the forums. That’s also the place to go if you have questions or need support.
Thank you for choosing ND1. We hope it will become a trusty tool to you.
What’s next?
(c) 2010-2013 Naive Design. All rights reserved.