Visualizing 987!

We already have the image’s name on the stack (on position two, the string “987!”).
We also have the data (our big hex number), but we need to wrap it into a string:
Go the String menu and tap →str (→STR)
What’s missing is the width and height of the image.
For an 8-bit gray image, width * height has to equal the data size.
For an 1-bit binary image, width * height / 4 has to equal the data size.
For a 32-bit RGBA image, width * height * 4 has to equal the data size.
As the image is constructed, the color space and bit depth will be chosen according to the relationship between size and specified width and height values. Values that do not match one of these three sizes, will be regarded invalid and the image function will fail with an error.
In our case, we have to work backwards from the data size to arrive at suitable values for width and height, where both these values have to be integers, as there’s no such thing as a partial pixel.
The size reported for the string, 2104, includes the text “0x”, which is not part of the actual data. Subtracting 4 for the length of “0x” and the quotes, the data size is 2100.
We want to display the bits in the number, that is, the data is to be interpreted as a binary image.
As per relationship “width * height / 8 = data size” from above, we seek values width and height for which is true: “width * height = data size * 8”. That is, we’re looking for divisors of “data size * 4”.
Let’s build a little problem that carries out the necessary calculation, and gives us divisors choices for any given reported string size. In fact, let’s simply build this by recording our steps as we go one time through this calculation.
Enter “2104” (w/o quotes)
Go to the Program menu
Tap ● rec

(notice the red dot, indicating action recording is on)
Tap 4
Tap -
Tap 4
Tap *
Switch to the Real menu and find and tap the divs key, or type and enter “divs” (w/o quotes)
Switch back to the Program menu (if you switched menus in the previous step)
Tap ■ stop
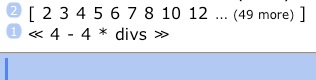
You now have an array with candidate widths or heights for the image on the stack, along with a program to reproduce them for other data sizes. Let’s store the program for later use.
Enter ‘showCandidates’
Tap →⊛ (STO)
For this specific data size, there’s a great choice of divisors (most other data sizes will give you far fewer). We want to pick values that result in a roughly square image.
To see the greater divisors, edit the array, now on stack position 1.
Tap ⇩(EDIT)

Use your finger to scroll through the values.
Let’s settle on 80. (We could also have determined the median value in the array.)
Tap the Drop key to clear the edit line.
Enter “80” (w/o quotes)
This will be our desired image width. Lastly, we need the corresponding height.
We need the matching divisor (from the array we just looked at) that, when multiplied with our first choice, results in ‘(datasize - 4) * 4’. You could build another program for that.
It’s 105. (That is, 105*80 = 2100*4.)
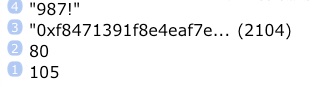
Enter “105” (w/o quotes)
Your screen should look like this now:
Go to the ∿ (PLOT) menu.
Tap → (NEXT)
Tap image

Tap Eval
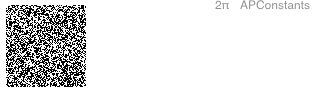
This is a visual representation of 987!, with every pixel representing one bit in the number.
We wished for a discernible pattern, but, alas!, there doesn’t appear to be one here.
You have the tools now to try out other numbers. (Alarm us, and the world, if you find one...)
It would be a nice improvement to the ‘showCandidates’ program to find both suitable width and height values from the array of choices, and return those on the stack.
Another program could then bundle all the steps together (produce the bignum factorial result for a given number, compute suitable width and height, create the image) and produce an image in one step.
Add yet another program that calls the one-step program in a loop, displays the image, takes a screenshot and leaves it on the stack, and you’d go on an automated search for structured patterns in the bits of factorials.
Overview
In this tutorial, we compute 987! (factorial) and make the resulting 2500-digit number “visible”.

(c) 2010 Naive Design. All rights reserved.

987!
In the same spirit of visualizing numbers like in The Fib Triangle, let’s display the bits of a single huge number, instead of a sequence of numbers. It would be (more than) exciting to spot a pattern in this image.
987! (factorial) is a really big number at 2529 decimal digits. (Numerical value 4.3...e2529.)
(Why 987? It’s a Fibonacci number, but we’re picking it arbitrarily here.)
We’ll need a name for our image. Let’s simply call it “987!”. Type and enter “987!” (with quotes!).
Now let’s compute the value. Type 987!

Tap Enter
The number is displaying in the current default bignum format, which might be any of hexadecimal, binary, or decimal for you. If you don’t see a hexadecimal number, type “toHex” (w/o quotes).
Similar to the fib function, the “!” (factorial) operator switches over to bignums for really big results. (The switch-over point is at 100!.)
In The Fib Triangle, a program somehow transformed numbers into an image. We don’t have such a program now.
Let’s do the required steps “manually”, and learn about the image command in the process.
The “image” command
ND1 has a command, image, that will create an image, given
-
-a name string
-
-a hexadecimal data string
-
-width and height dimensions consistent with the provided data, and one of the three possible interpretations for the data: a) binary image, b) gray image, c) RGBA color image
We will use this command to create our image.
Creating the image